
25 Dec 2025
 In Site Settings Area:
The AI-powered website design process on createWebAI.Com
To automatically design a website using AI with createWebAI.com, you need to follow these steps:
1. First step: You need login into createWebAI.Com
You need to follow the instructions in SECTION 3 of the following article:
If you don't have an account in this site, so you can create a free account like SECTION 1 in above article.
2. Second step: Open the website design AI window
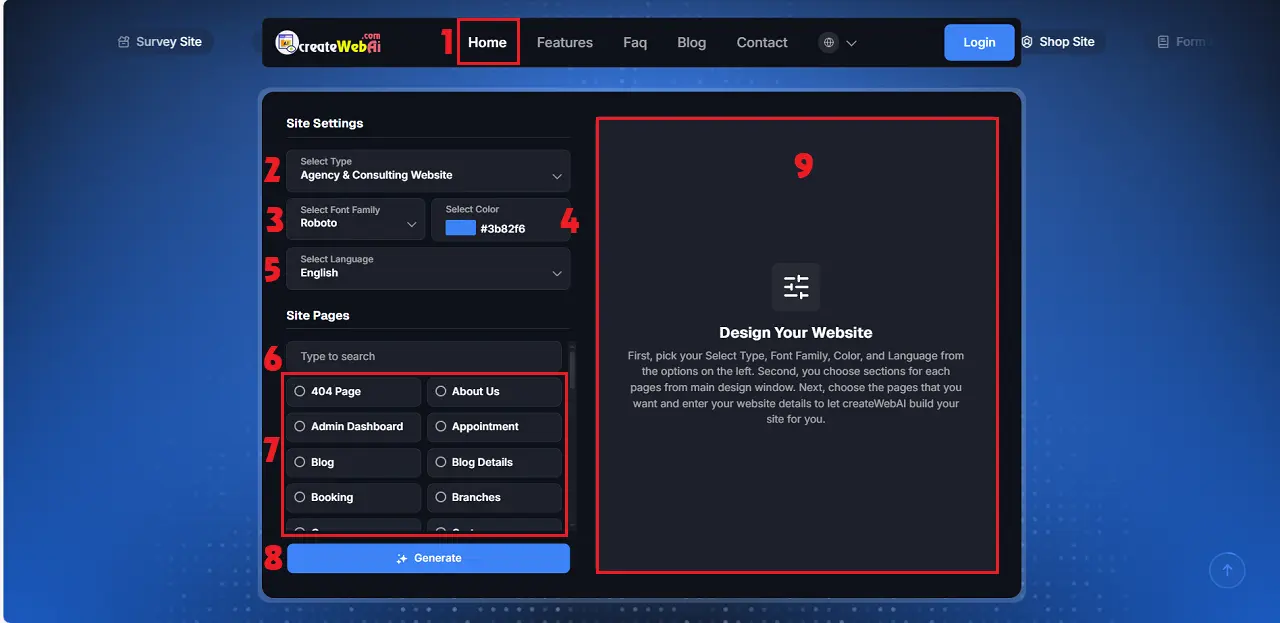
You click on HOME (1) menu => Next, scroll down to see the AI website design area like Illustration 1 bellows.
Illustration 1: Website Design AI Interface 1
* Notes:
+ Site Settings Area: This area allows you to choose the website style you want to create, select the font, main color, and language for the website.+ Site Pages Area: In this area, you will select the necessary pages for your website. The selected pages will be displayed in the design window, as shown in the red box number 9 of Illustration 1 above.
3. Third step: Website design using AI
3.1. Configure the website settings
+ You click on Select Type (2) to choose site type for your website.+ Click on Select Font Family (3) to choose font for your website.+ Click on Select Color (4) to choose main color for your website.+ Click on Select Language (5) to choose language for your website that's generated in this language.
3.2. Choose Pages for your website
In Site Pages Area:
+ You click on Type to Search (6) control to find the pages that you want to add for your website.+ You click on Page name in the red 7th area to choose the page for your website.=> When a page is selected, it will be displayed in the red area number 9 - Website design area, as shown in Illustration 1 above.
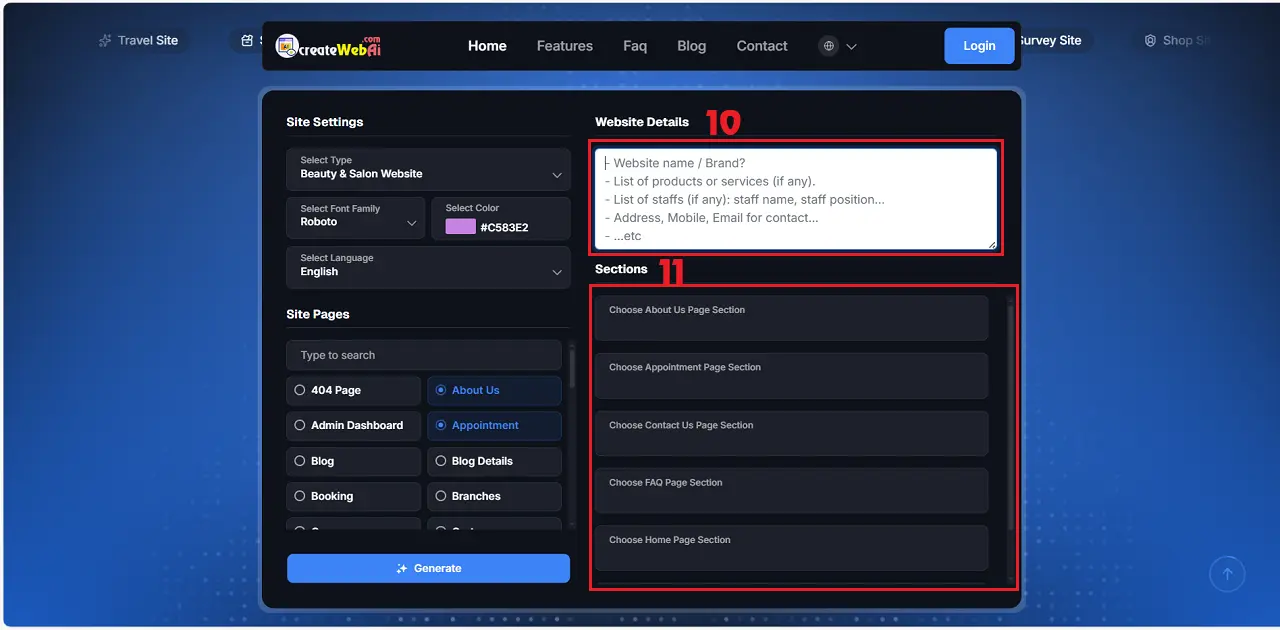
Illustration 2: Website Design AI Interface 2
3.3. Choose sections for each pages
In Sections Area (11) like Illustration 2, For each page, click on it and select the elements for it. The result is similar to Illustration 3 below.
3.4. Add Website details
In Website Details Area (10) like Illustration 2, You need to enter the necessary descriptive information for your website as suggested in this box. This information will help the AI create a website that matches your specifications.
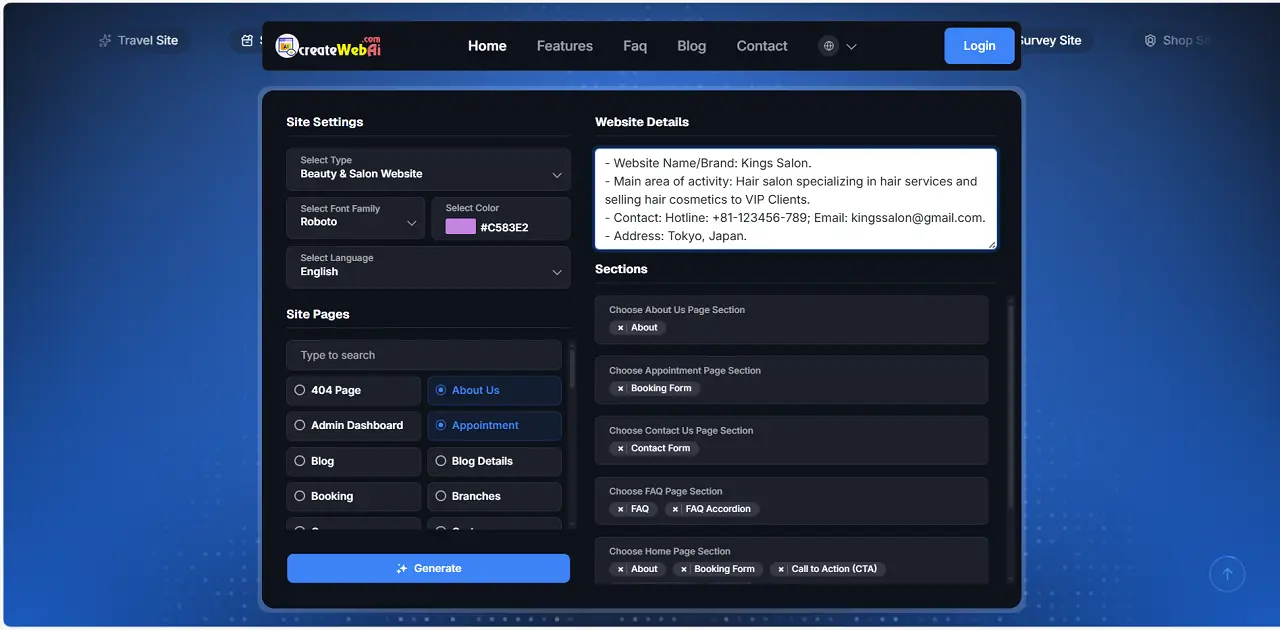
Illustration 3: Complete website design data entry interface
=> Once you have fully configured all the necessary parameters for your website, click the GENERATE (8) button to instruct the AI to create the website for you.
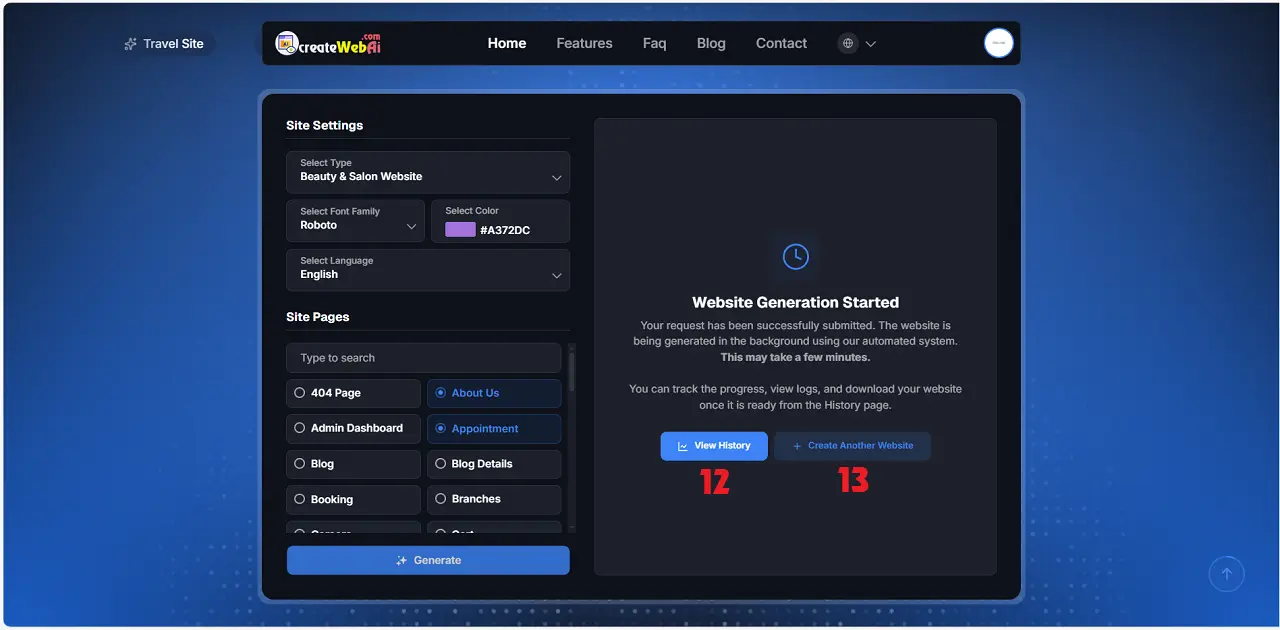
Illustration 3: The interface completes the process of instructing the AI to design the website.
3.5. Track website design results from AI.
In Website Generation Started window like Illustration 3 above, you click on View History (12) button to see the result of website design by AI.
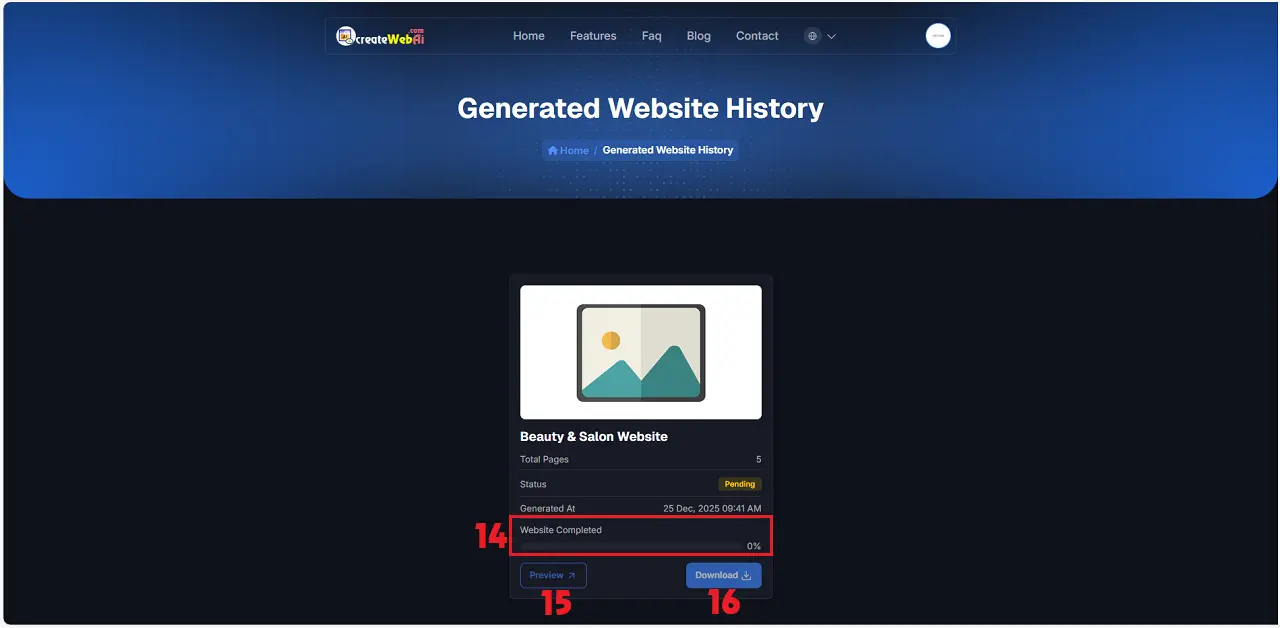
Illustration 4: Generated Website History
* Notes:
+ Website Generated (14): Indicate the completion rate of website creation by AI.+ Preview (15): Click on this button to see your website. This function can only be implemented once the website has been successfully created by AI.+ Download (15): Click on this button to download source code of your website to your PC. This function can only be implemented once the website has been successfully created by AI.
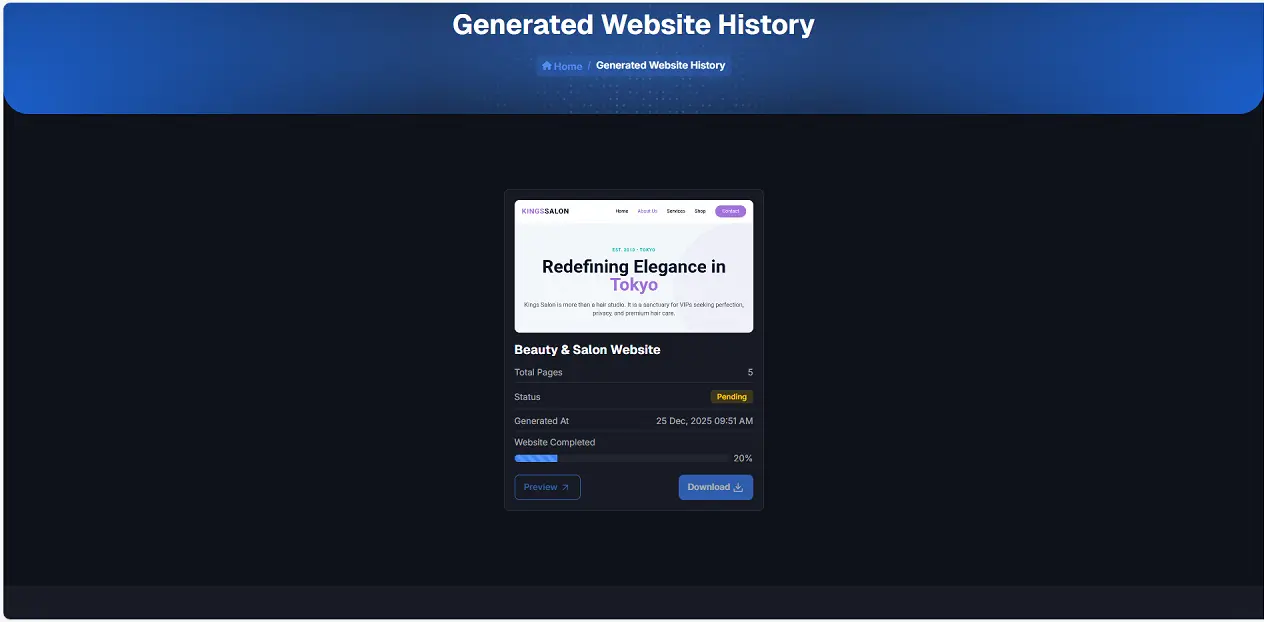
Illustration 5: Generated Website History